Recent blog posts
Pete Eamsuwan • 12/29/2022
CICD Pipeline with AWS Code Pipeline
Set up CICD Pipeline for your github projects using AWS Pipeline, to deploy your static content automatically.
In the last article, we learned about code-splitting, which allows us to break up our JavaScript code into smaller, more manageable files. While this improves the responsiveness and user experience of our blog, it can be a hassle to manually upload all of the new assets to our Amazon Web Services (AWS) S3 bucket. In this tutorial, I will show you how to set up a continuous integration and deployment (CICD) pipeline that automatically builds and deploys our assets to the S3 bucket where our blog is hosted whenever we push our changes to GitHub.
Pre-requisites
This tutorial assumes that you are already hosting your content on an Amazon Web Services (AWS) S3 bucket. If you are not familiar with hosting content on an S3 bucket, you may want to familiarize yourself with the process before proceeding.
AWS CodePipeline
AWS CodePipeline is a continuous delivery service that helps you automate your software release process. It allows you to define a series of stages that your code goes through, from building and testing to deploying to production.
Creating a Pipeline
Let's start by creating a pipeline. Navigate to the AWS CodePipeline console and click on "Create Pipeline."
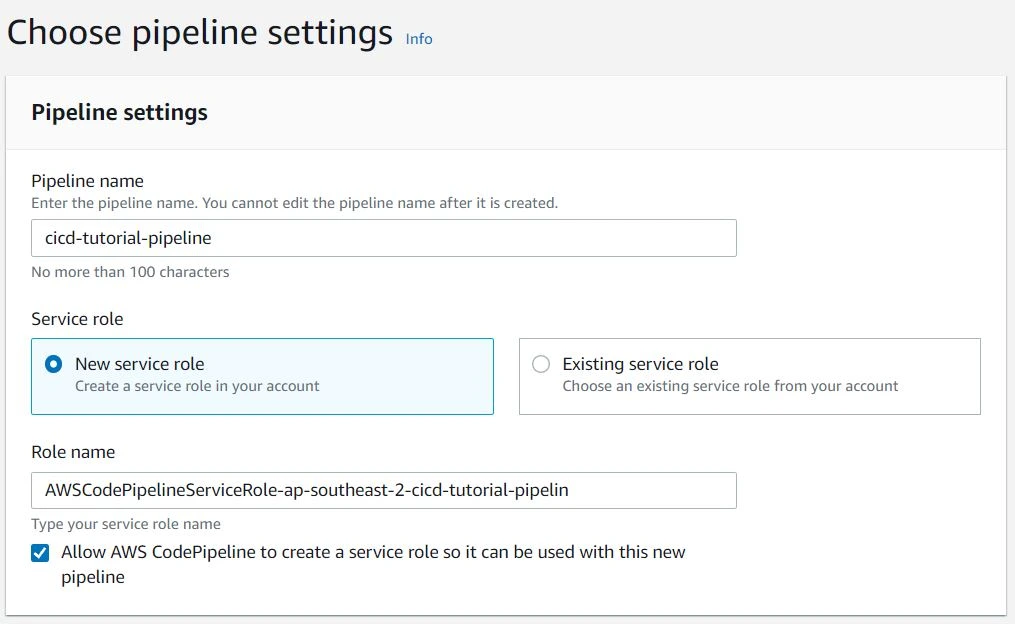
On the next screen, fill out the name of your pipeline and choose "New service role." The role name should be automatically populated. Click "Next."
Choosing your source
Next, you will need to choose the source of your build. In this case, we will be using GitHub.
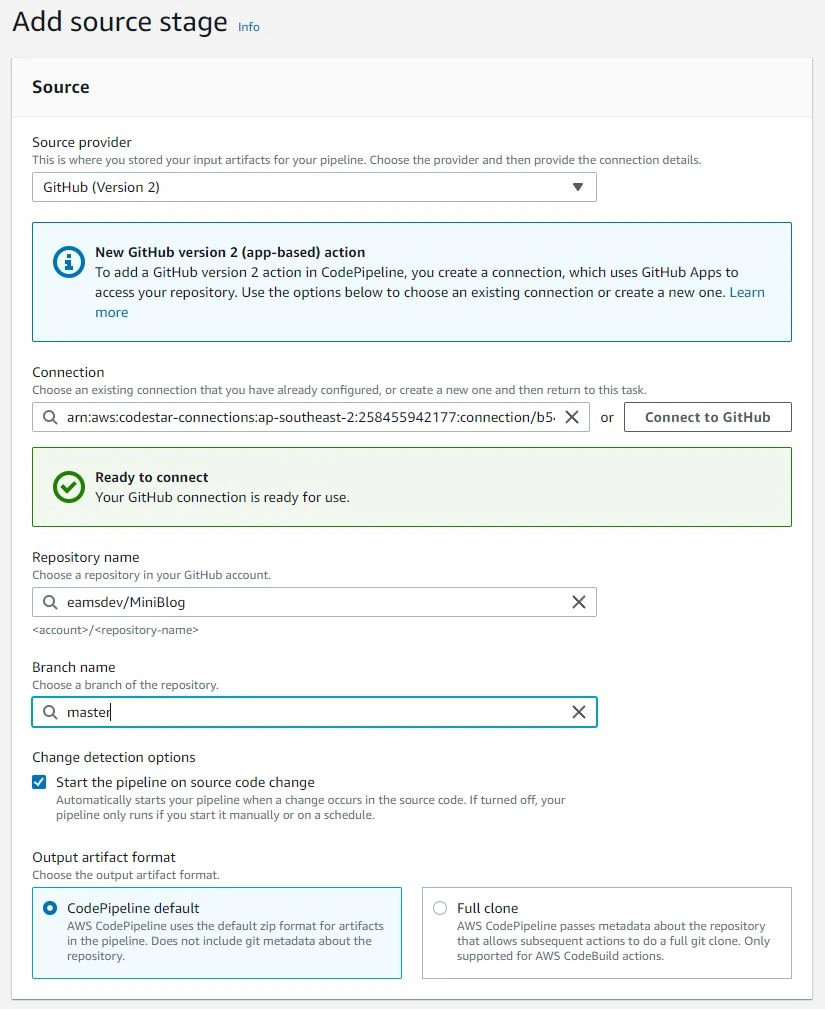
Select the following:
- Select "GitHub (Version 2)" as your source provider
- Create a new connection to your github by clicking "Connect to Github" and follow the prompts to allow AWS to access your GitHub repository.
- Then, choose your repository and branch name.
- You may also want to enable the option to "Start the pipeline on source code change" so that the deployment process is automatically triggered when changes are made.
- Leave the rest of the settings as default.
Configure your build stage
Now, we will configure the build stage. For this, we will use AWS CodeBuild. Click "Create project" to configure your new build project and configure the following:
- Project name - as appropriate
- Environment - as below
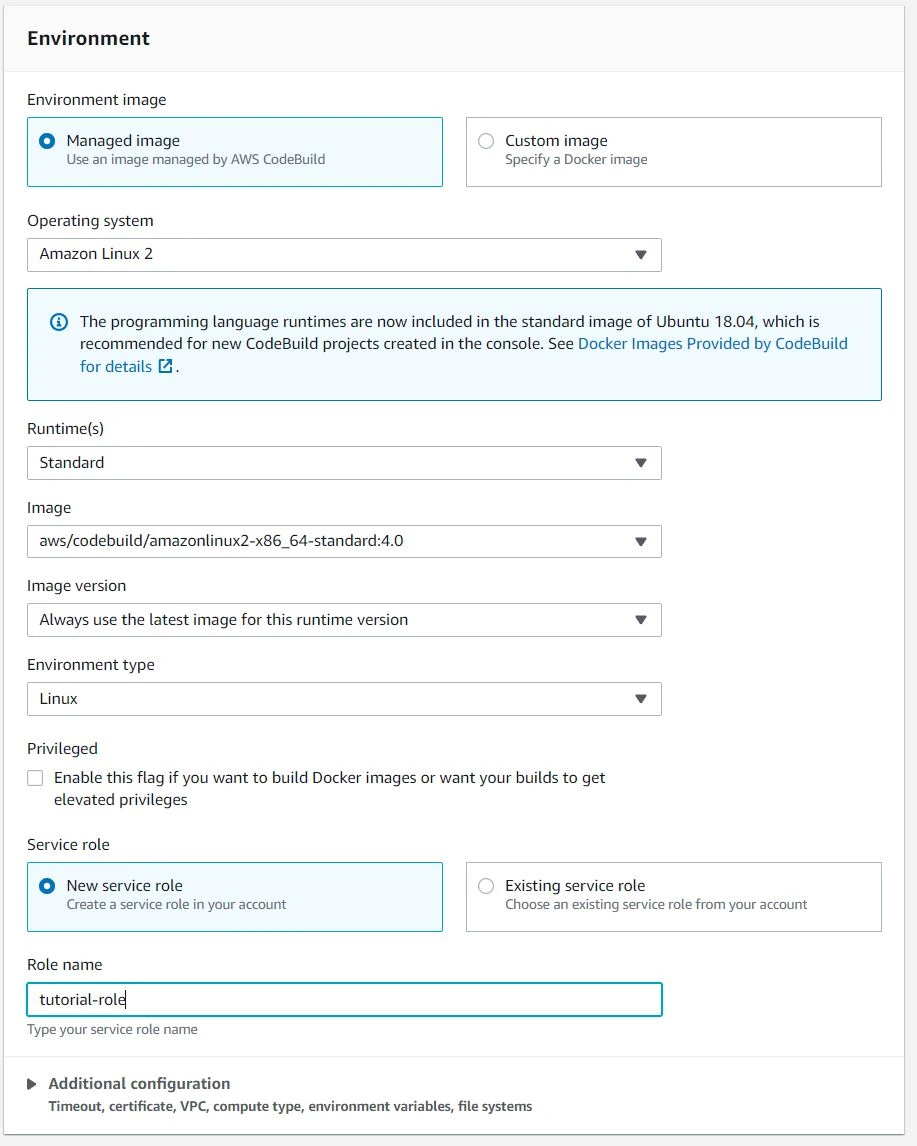
- Buildspec - we will use a buildspec file as this can be source controlled
- Leave the rest as default
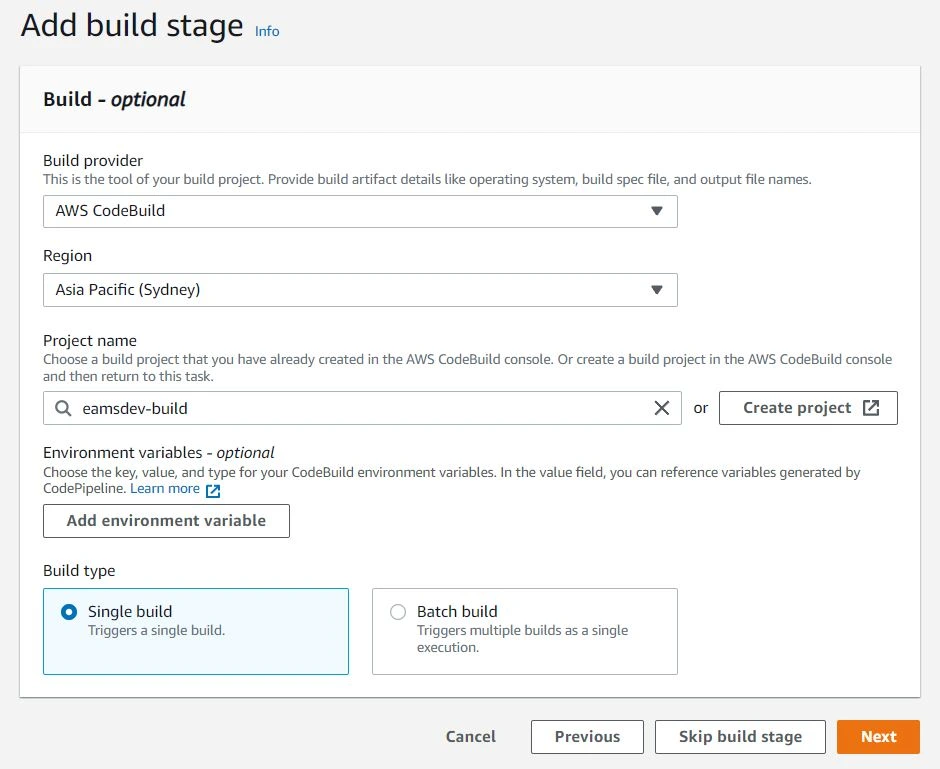
Click continue to code pipeline, and select the project name you had just created. Leave the rest of the settings as default and click next.
Configure your deployment
Next, we will configure the deployment stage. You will need to configure the following:
- Amazon S3 as the deploy provider
- Choose the appropriate region.
- Select the bucket that your static content is being served from.
- Make sure to enable the option to "Extract file before deploy."
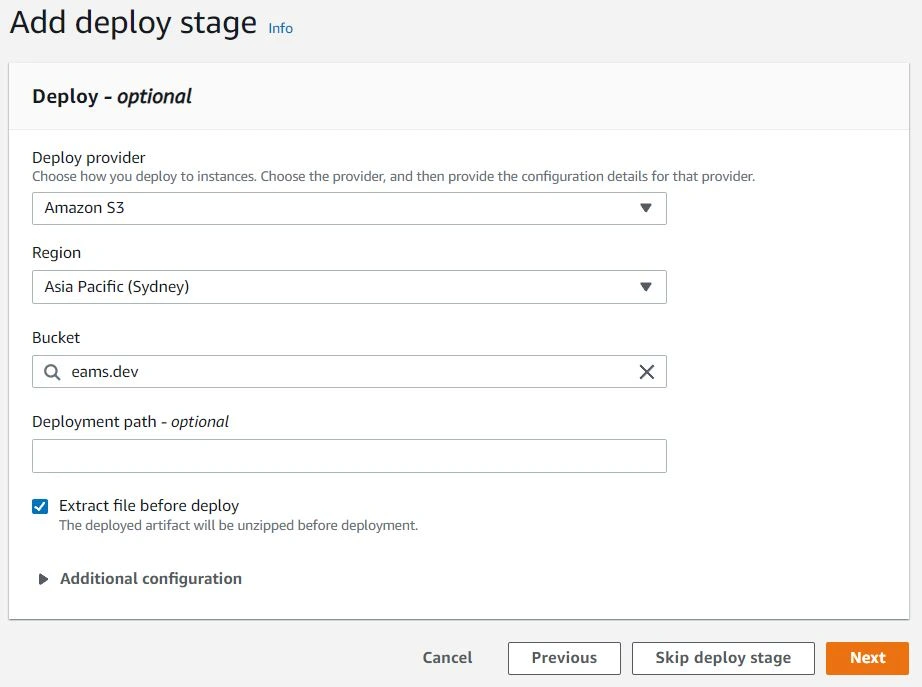
Click Next and review and complete your changes.
Configuring your build spec
The Pipeline, when configured like the above relies on buildspec.yml for build instructions. Here is how I have configured my buildspec:
version: 0.2

phases:
  install:
    commands:
      - npm update -g npm
      - npm install -g yarn
  pre_build:
    commands:
      - yarn install
  build:
    commands:
      - yarn run build
artifacts:
  base-directory: 'dist'
  files:
    - '**/*'
There are a few key points to note in the build configuration above:
- First, we install the Yarn package manager.
- Then, we install the dependencies required for the project.
- Next, we build the static content using the
command.yarn run build - Finally, we include all of the files in the
directory as artifacts.dist
Alternative build steps
There is one potential downside to using this configuration to deploy to an S3 bucket: outdated files will not be removed from the bucket. If you want to keep your bucket clean, you can use the following alternative build steps:
version: 0.2

phases:
  install:
    commands:
      - npm update -g npm
      - npm install -g yarn
  pre_build:
    commands:
      - yarn install
  build:
    commands:
      - yarn run build
      - aws s3 sync ./dist s3://{BUCKET_NAME} --delete # Perform your deployment as part of the build step
artifacts:
  base-directory: 'dist'
  files:
    - '**/*'
This will sync the
dist--deletedistTo make this work, you will need to give your build step the necessary permissions to sync with your S3 bucket. To do this, navigate to the IAM console and add the following permissions to the IAM Role for your build step:
{
  "Version": "2022-12-29",
  "Statement": [
    {
      "Resource": ["arn:aws:s3:::{BUCKET_NAME}", "arn:aws:s3:::{BUCKET_NAME}/*"],
      "Sid": "Stmt1464826210000",
      "Effect": "Allow",
      "Action": [
        "s3:DeleteObject",
        "s3:GetBucketLocation",
        "s3:GetObject",
        "s3:ListBucket",
        "s3:PutObject"
      ]
    }
  ]
}
Finally, to disable the deployment step to deploy as part of the build process, navigate to the pipeline and click "Disable transition" between the "Build" step and the "Deploy" step.
That is it! I hope you find this tutorial helpful.